Saturday, November 20, 2010

First Craft Show - Success!

I have completed my first craft show!  It was an awesome experience.  I can say I have truly learned a lot about my products and what people will buy.    


What I sold: unique, one-of-a-kind, handcrafted totes and zipper pouches... and fleece Elf Hats.  Wearing the elf hat all day really made people smile and helped me begin to feel a little holiday spirit.  


Here we are at the very beginning... still setting up and getting things perfect.  Pictured with me are the namesakes for the blog, my kids Sam and Allie.  They were huge sports to get up so early to help out.  I very much appreciate all they did (set up, pricing, labeling, arranging, putting up with me!) - I am so lucky.


 Thank you to all of my family and friends for their support today.  It was awesome to have all of my sisters helping out... too bad I didn't think to get a photo. Next year?!
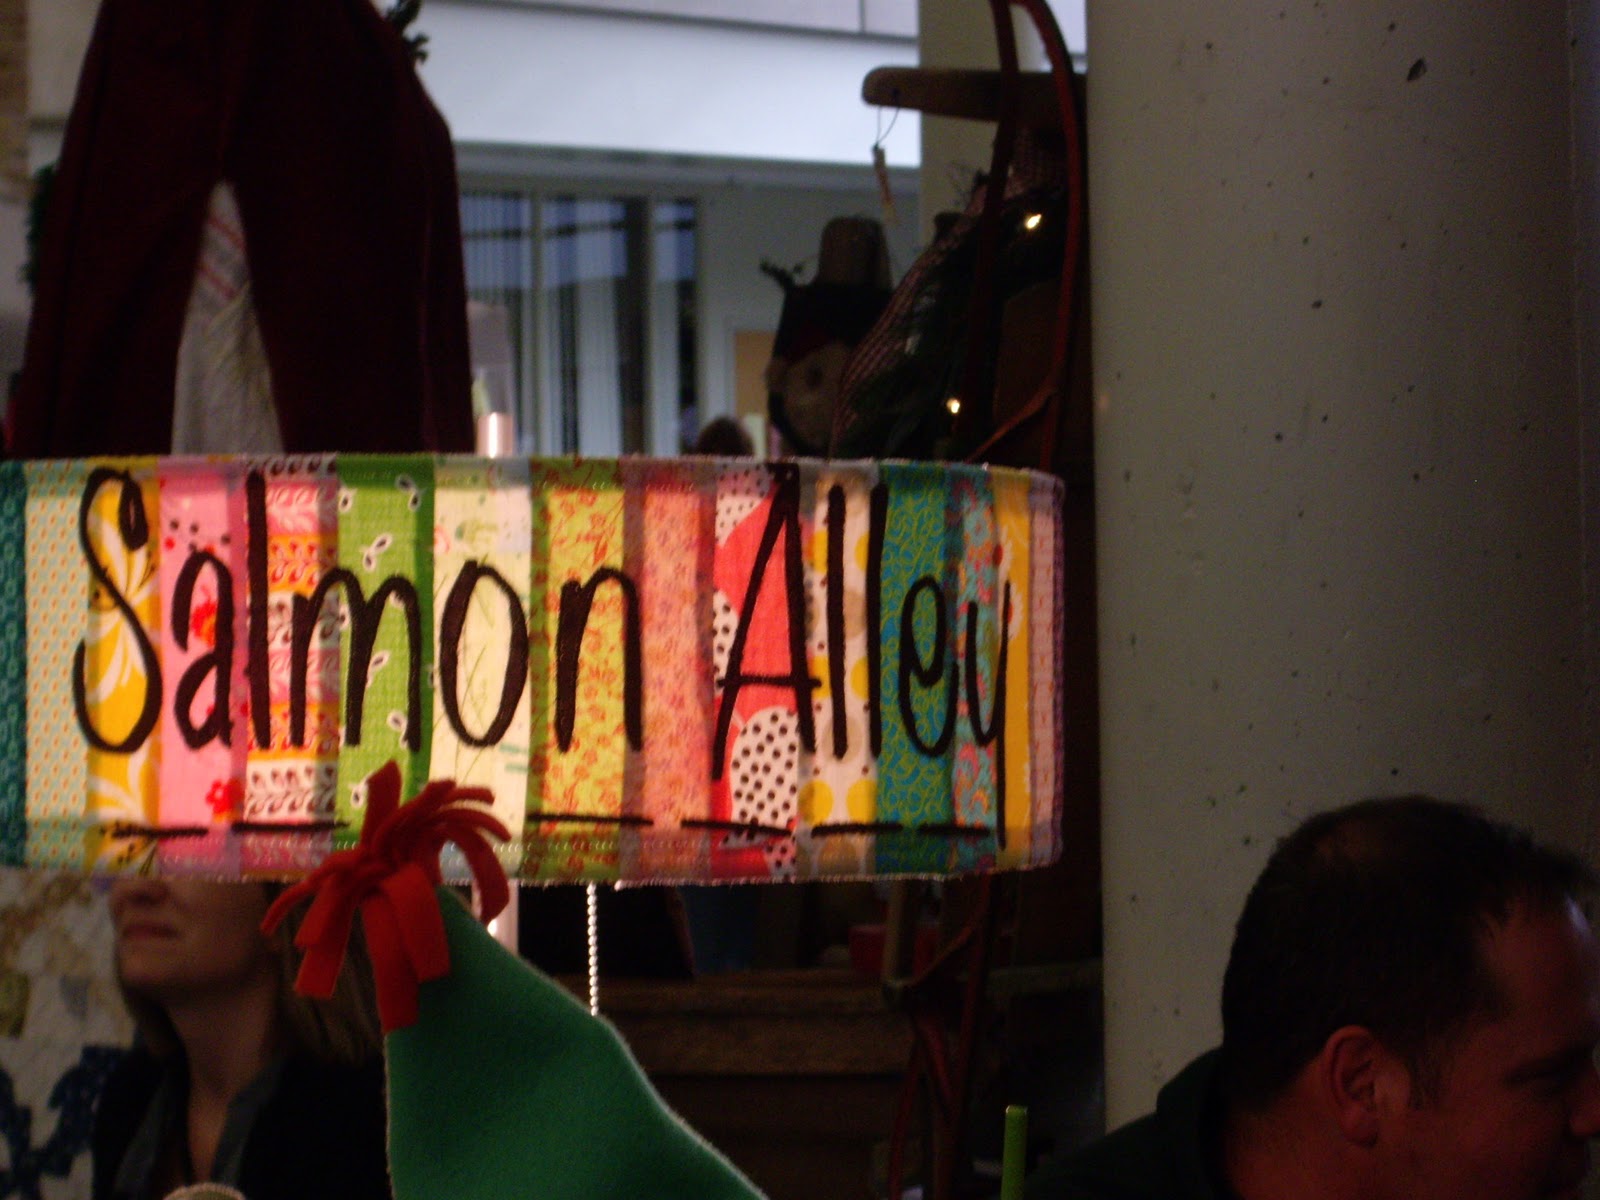
The biggest hit turned out to be my Lampshade sign - which was meant to be a banner.   But it was too tall, no where to hang it in the booth.   I cut it and pieced it horizontally and it fit perfectly on the lampshade... very cool!  This is a photo in the booth and another at home.  

I'm taking orders!   Great addition to a kids room, family room etc. 


The big bag!   It's a beautiful bag, sold!  I know it's going to a good home with someone who will love it. And I am designing a cosmetic bag to go with it! I'll put a photo of the new design on the blog soon. 


If you stopped by the booth, give me a shout, I'd love to hear from you.  If you purchased something from me, thank you! I hope it brings you joy. 

Monday, October 4, 2010

September's over!

 Here's one of my latest creations.
A large tote with some very fun fabric. 
My labels were designed by mommiemadeit (etsy).

I really love this fabric.
  

We make pizza most Friday nights (thanks to our friends Kevin and Jenny).  We make a full batch of dough and have more than enough for pizza and other treats.  We've made stromboli, pepperoni rolls, bread sticks, cheesy bread sticks and garlic knots.  I decided it was time to add Monkey Bread to the Friday Night/Saturday Morning Routine.

  I took about 12 ozs of dough (enough for a small pizza) cut it into to small bits and rolled into 4" long rolls.  After letting them rest for a few minutes, (they get back some of their elasticity) I tied them into knots and set them aside while I prepared the sauce.

Recipe for Sauce:
3/4 c brown sugar
1/2 stick butter
pinch salt
Cook over low heat until brown sugar has dissolved into the butter, 
stirring occasionally.  

Pour into a well greased baking dish. I used a 2.5 liter corningware dish.
Mix 1/2 c granulated sugar  & 1/2 - 1 tsp cinnamon  (to taste)

dip knots in the cinnamon sugar and put on top of sauce.  
The knots will expand while baking.
Bake at 350 for about 20 minutes.  
I will make these again soon and test my own recipe!!   They really were delicious! 


If you are ever in Chapel Hill you must go to Sugarland.  
www.sugarlandchapelhill.com
The gelato is out-of-this-world good.  
The cupcakes looked divine but I went for the gelato 
after having seen their show on Food Network
I didn't try their signature gelato martinis (it was morning) 
but went straight for a chocolate & coconut combo.  
Sigh.  I wish we lived closer.
 So many tempting flavors.  They were patient with me and the kids as we decided and they offer samples.
 My dish was clear... that's all chocolate on the bottom. 


I added a new app to my phone, a very fun Retro Camera 
(thanks to Kristen) and took a few cool shots.  
Last week, this train was in front of the office.   
The plant was growing in the garden beside the roses... about to drop all of its seeds. I thought it was very pretty though I don't recall seeing it in bloom.  The leaves remind me of a sunflower but the seed pod looks more like a poppy.  

I may have a bunch of them next year, if anyone is interested.


 And Molly, the long awaited pillow is complete.
Now the hardest part, getting it mailed.  
This was a fun project that I started in earnest - way back in April.  
I think it will look right at home on her couch.

The weather has turned chilly and I have more time to work on my projects without feeling guilty for missing all of the perfect weather of the last few weeks of September.  
I look forward to a productive October.

Enjoy.

Thursday, September 2, 2010

Something different

I've been distracted by other blogs lately and inspired...
so I'm going to try something different for a time. I'm going to share some of my favorite recipes, garden shots and other events going on in my live since I don't have a lot of time to sew or craft these days.

I hope you enjoy the new change to the blog.


I've stumbled on a recipe for Belgium Waffles. The recipe seemed fairly simple (it is!) and all you need is patience to let the yeast rise. My kids prefer these waffles to the Local Belgium Waffles which are fantastic! So give them a try... they are so tasty! and they reheat well in the toaster.


http://whippedtheblog.com/2010/03/15/liege-sugar-waffles-perfected/

I actually made this plateful... yummy!


This year, the garden got a little BIG. The Crepe Myrtle isn't supposed to thrive way up here in Zone 6 yet mine is 10 feet and growing. The Russian Sage and other perennials are crowded in their plots... looks like dividing time this fall or next spring.


Poor Trudy, she works so hard protecting our house & family... nice to see her relax every once in awhile. (Technically, she's not allowed on the furniture but the kids keep telling me she sleeps in the chair when I'm not home and I finally caught her in the act.)


Now that school's back in session for the kids, I hope to find a bit more time to put down my thoughts and hopefully get crafting again.


Monday, May 3, 2010

Crafty Chica Challenge: Garden Glam


Sweet plant marker... soon to be a complete set. I recently planted herbs in the kitchen garden and wanted a way to tag them... without keeping the plastic tags. (Very important when sending kids or husbands to garden for thyme and they bring back sage.)

I used some burlap from a recent purchase of garlic. Folded it into rectangle, slip stitched it closed and free hand embroidered a design and THYME. I plan to make others with simple designs of leaves or flowers for each plant in the kitchen garden. For the moment, I used a wire coat hanger for the hook and stand. I will work on improving this... maybe bamboo stakes.

I'll post the others when I've finished them. In the meantime, I've entered in the Crafty Chica Challenge: Garden Glam contest... at the last possible minute!

Enjoy!

copyright salmonalley 2010


Crafty Chica Challenge: Garden  Glam

Tuesday, March 16, 2010

Quilting Backwards

I love to make baby quilts.
They are small, which means I usually can finish them
and fun to make for friends.


The first one I made, for a friend at work, was with Beatrix Potter fabrics. I rounded up some cute fabrics and made the top. (no photos, this was done in 1999). After I finished assembling the top, I searched everywhere for a coordinating Beatrix Potter print for the backing. I had decided not to use a plain white in order to offer more choices for the baby and less chance to show dirt for the Mom. Lesson learned - plan differently for quilts.

When I made the next quilt, I decided to start with the back print. I found some very sweet flannel prints and matched fabrics for the front. (again, no photos) I bought all of the fabrics together and planned the quilt based on the colors in the printed flannel. I scaled the quilt design to the scale of the print on the flannel.


Using this technique, I made this quilt for a friend who had a boy. I fell in love with the frogs and thought she would enjoy the vibrant orange, green & blues of the fabrics.


The inspiration fabric: printed flannel Hip Hop Frogs


The quilt front:


Front & back together... pretty sweet!


I thought the quilt top need a little extra, so when I finished machine quilting it to look as though a bumble was flying around, I embroidered a few bees.


I am starting another quilt project for a friend with a baby girl...
I'll blog about the fabrics next.


copyright salmonalley 2010


Sunday, February 28, 2010

Olympic Fever 2010


For the first time, I joined the Schmancy Olympics Challenge (www.schmancytoys.com) to create a plushie representing an Olympic Sport. I was given Bobsled. I worked on my project all month and created a couple of variations.

Bob Sled Hill was the first attempt. I wanted the mountain to look like the Mater Horn, but it ended up looking like a blob. So, I went with a two-man team and created a sled and the team- mates. It was a fun challenge and I enjoyed the process. I look forward to sharing the results when the contest is finished.

Sunday, January 31, 2010

Mid Winter Blues - Tic-Tac-Toe

The end of January approaches and the end of the cold weather is many months away. I often think about our vacation last summer at the beach with fondness remembering the warm sunny days. This quick & simple craft will make an afternoon fly-by with warm thoughts of summer.


I went beach combing for hours during our vacation and collected many different shells and realized I could collect enough to make some tic-tac-toe boards for the kids to play with in the car, on the plane or just anywhere.

It's very simple.

Using scraps of fabric and a short zipper (4"-7") & some braid or ribbon you can make a portable tic-tac-toe game.

I selected a soft piece of fabric (about 6" -8" square) to cushion the shells and some coordinating braid (just under two yards).


First, I sewed the braid onto the right side of one of the squares in the form of a number sign (#).


Then, I put the right sides together and sewed in the zipper.

Next, I sewed the three sides closed.
Remember to unzip the zipper to make turning the bag easier.


I inserted about 6 inches of braid to the center of the bottom edge of
the bag in order to be able to roll up the bag and tie it into place.


Trim corners, turn the bag right-side out.

I included five white and five colorful shells for the X's and O's.

It's a cute little package full of summer delights.
Collect nuts, rocks, twigs, pine cones or any other natural item for the game.


Enjoy!